
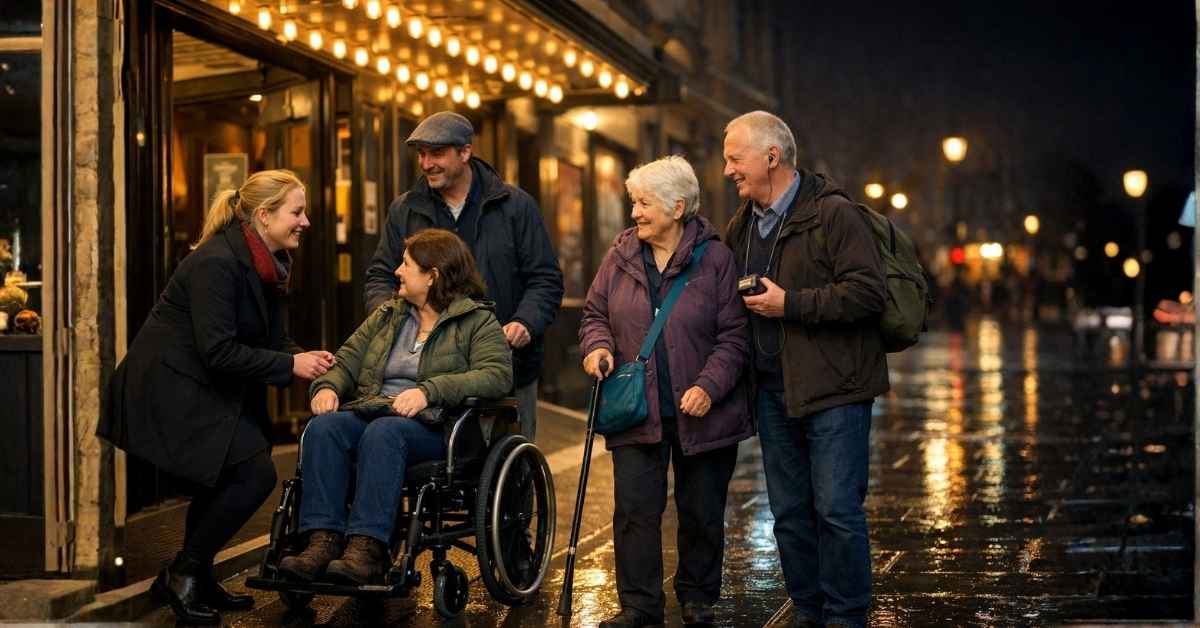
Accessible London Musicals: How to Book Tickets and Plan a Visit If You Have Access Needs
Accessible London theatre planning gets easier when you treat it like a workflow, not a gamble. This guide shows you how to book the right seats, request support early, and map step-free routes so your day runs smoothly. You’ll learn what to ask the venue, how companion tickets work, and how to arrive calm and ready.
What This Guide Helps You Do (and What to Prep in 2 Minutes)
Accessible London musicals become much easier to plan when you follow a clear, repeatable booking workflow. Instead of guessing at seating plans or hoping the venue layout matches the ticket label, you’ll use practical checks that reduce surprises and protect your comfort on the day. You can start your search on MusicalsAndTickets.co.uk to compare show options, then use the steps below to lock in the right access setup.
What this guide helps you do
- Book the correct ticket type by understanding the difference between a wheelchair bay, a transfer seat, and an aisle or low-step option that minimizes stairs and tight rows.
- Request support early so you’re not scrambling on arrival for essentials like a hearing kit, captioning setup, audio-description headset, or the correct step-free entry route.
- Plan transport that matches your energy and mobility limits by choosing routes that reduce walking, avoid unnecessary changes, and build in realistic timing.
- Avoid the classic trap of buying tickets first and only discovering the stairs, steep steps, or awkward access route when it’s too late to fix calmly.
What to prep in 2 minutes
- Your top 2–3 access needs (keep it specific): for example, “step-free entrance,” “minimal stairs,” “hearing support,” “captioning,” or “quick exit access.”
- Transfer or stay seated? Decide whether you’re transferring from a wheelchair to a theatre seat or remaining in your chair for the performance.
- Companion/PA seat requirements Note if you need an essential companion seat next to you (or as close as possible) for support during the visit.
- Your arrival buffer (realistic, not optimistic): choose a time cushion that accounts for slower pacing, lift access, queues, and route uncertainty.
Once you have those four details, the rest of the planning becomes straightforward: compare shows and dates on MusicalsAndTickets.co.uk, then apply the access checks in this guide so your booking matches your real needs, not a generic seating label.
Key Terms Venues Use (So You Don’t Get Caught by Vague Wording)
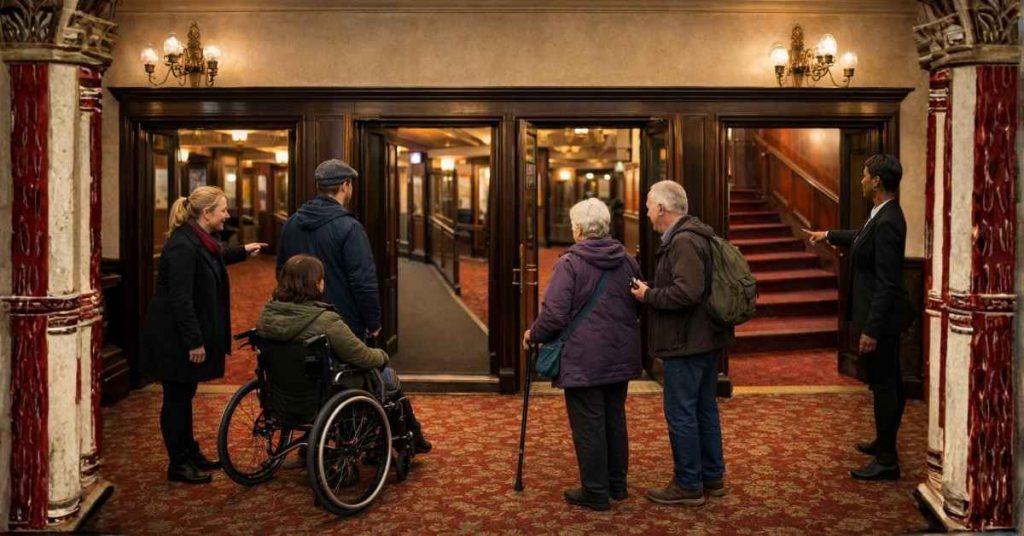
London theatres often use short labels that sound reassuring but hide important details. Before you book, translate the venue’s wording into real-world expectations: how many steps, which door you’ll use, how tight the route is, and whether your seat position actually works for your body and support needs.
“Step-free access” vs “level access” vs “ramp required”
- Step-free access usually means you can reach key areas (entrance, seating zone, accessible toilet) without stairs, using lifts and/or ramps. The catch: it may only apply to certain parts of the building, not every bar, foyer level, or seating tier.
- Level access is stronger language. It generally means flat entry without steps and minimal gradients. Still, “level” can be entrance-only—always check the internal route to your exact seat.
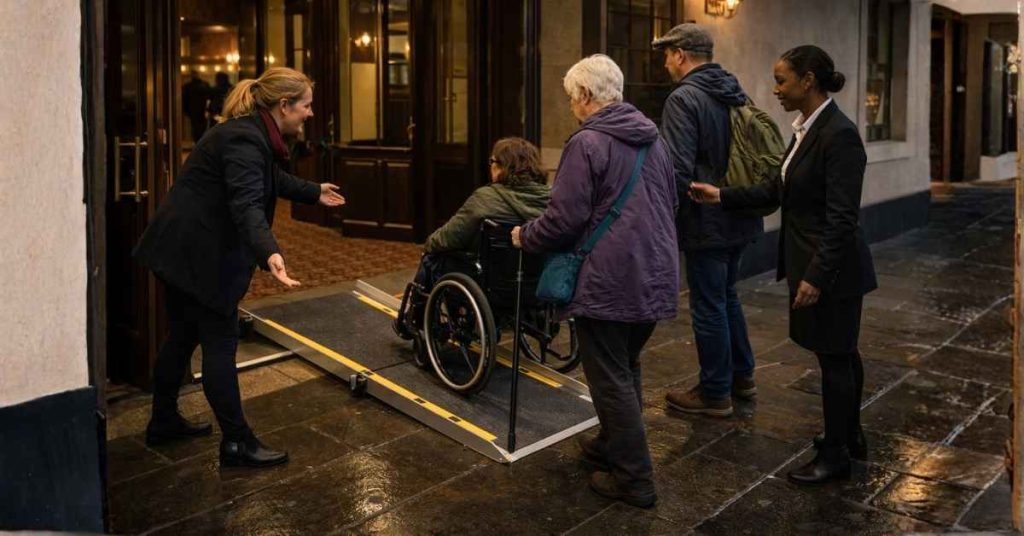
- Ramp required means the venue may have a portable ramp or a specific ramped entrance that staff set up. This can be smooth if arranged early, but stressful if you arrive late or the correct door isn’t clearly signposted.
Wheelchair space/position vs transfer seat
- Wheelchair space/position means you stay in your wheelchair for the show. These are fixed locations with specific sightlines and turning space, and your companion seat may be adjacent or nearby rather than directly next to you.
- Transfer seat means you move from your wheelchair into a theatre seat. Your chair is then stored (sometimes in a designated area). This option can work well, but it depends on whether transfers are comfortable for you and how far the storage point is.
“Ambulant accessible” seating
- Ambulant accessible typically refers to seats for people who can walk but benefit from easier access: fewer steps, aisle position, extra legroom, or proximity to accessible toilets. It’s not automatically step-free, and it doesn’t guarantee flat routes—think “reduced barriers,” not “no barriers.”
“Restricted view” (and why it can be worse with mobility limits)
- Restricted view means something blocks part of the stage: a rail, pillar, overhang, or side-angle obstruction.
- For many people, a restricted view is tolerable because they can lean, shift, or adjust posture. If you have mobility limits, pain issues, or need to stay stable in your seat, that “small” obstruction can become a constant strain—especially in long shows.
Hearing loop / infrared / FM systems
- Hearing loop supports hearing aids or cochlear implants with a T-setting by sending audio directly to your device. Coverage may vary by seating area, so “loop available” doesn’t always mean “loop works everywhere.”
- Infrared systems typically use a receiver and headset or neck loop. They can be effective, but you usually need to collect equipment pre-show and return it after.
- FM systems transmit audio to receivers via radio frequency. They often provide strong sound coverage, but you still need the right device and correct setup.
Captioned, signed (BSL), audio-described, relaxed performances
- Captioned performances display the dialogue and key audio cues as text, either on a caption unit in the venue or via a device-based system. Seat choice matters so you can see stage action and captions comfortably.
- Signed (BSL) performances include a British Sign Language interpreter positioned for visibility. You’ll want a seat with a clear view of both the interpreter and the stage.
- Audio-described performances provide spoken description of visual action through a headset, usually with a pre-show touch tour or briefing in some venues. Booking early helps reserve equipment and confirm the pickup process.
- Relaxed performances reduce strict etiquette pressure and may include softer lighting, adjusted sound, and a more flexible environment for people who benefit from lower-stimulation conditions.
Mini callout: Step-free doesn’t always mean stress-free—confirm the exact entrance and the route inside the building.
The Golden Rule: Book Access Seats the Right Way
If you take only one thing from this guide, take this: accessible seating works best when you book it through the people who control the access inventory. For access bookings, start with the theatre’s access team or box office whenever possible. That’s the fastest route to the correct seat type, the correct entrance, and the least hassle on the day.
Why this matters (and why “seat maps” can mislead)
Accessible seats aren’t interchangeable like standard seats. Two options that look similar on a generic map can feel completely different in real life. The venue access team can tell you what third-party maps often can’t:
- Exact step count and internal route (including whether you must use a different door or lift)
- Real sightlines from wheelchair positions and transfer seats (rails, heads, angled views, overhangs)
- Practical space details like turning room, companion placement, and whether the bay suits your chair size
- What “restricted view” actually means in that specific row, not as a vague label
You can still use MusicalsAndTickets.co.uk to compare shows, dates, and options efficiently, but treat the final access seat selection as a venue-managed booking decision—because it is.
Decision tree: the right booking route for your situation
-
Need a wheelchair space, step-free entry, or transfer support?
Contact the venue access team first. Tell them whether you’re staying in your chair or transferring, and ask for the best sightline options with the simplest route inside the building. -
No specific seating needs, but you want access pricing or a companion/PA seat flagged correctly?
Consider official venue access schemes (covered in the next section). These systems are designed to keep your access status on file so future bookings are smoother and less repetitive. -
Booking through a major ticketer or reseller?
Verify the accessible ticket rules before you pay. Accessible and companion tickets often have eligibility requirements, and misuse can trigger cancellation under the seller’s policies. If anything is unclear, route the booking back through the venue access team so you don’t end up with the wrong seat type—or a ticket that gets voided.
Practical takeaway: use aggregators to scout the best show and date, then use the theatre’s access route to lock in the seat that actually fits your body, your support needs, and your plan.
Access Membership Schemes (How They Work, Who They Help)
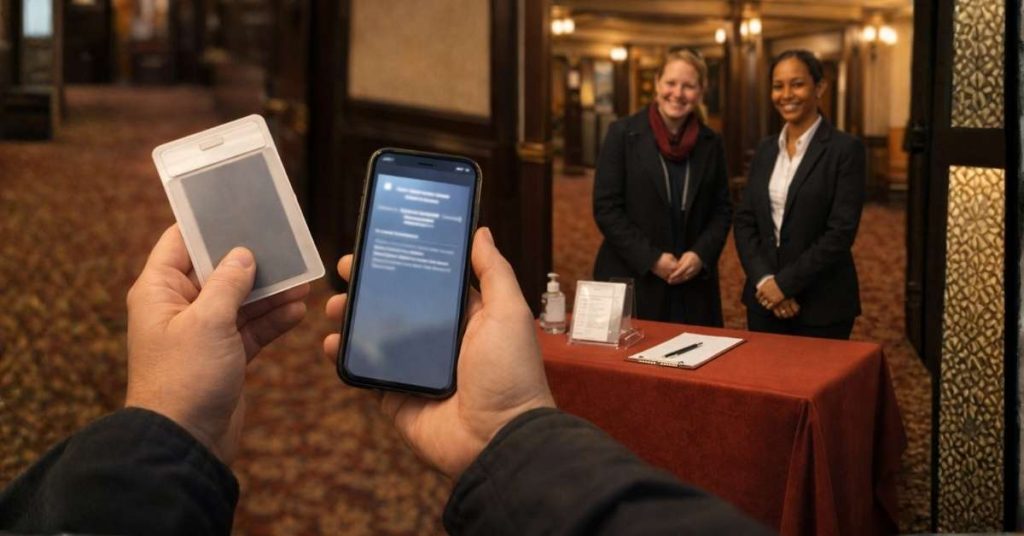
If you plan to see more than one London show—or you simply want a smoother booking experience—access membership schemes can save you time and reduce errors. These schemes typically store your access requirements so you can book eligible seats and request support services without repeating the same explanation every time. Think of them as a “pre-verified profile” that helps the system treat your booking correctly from the start.
ATG Access Membership (many UK venues)
ATG venues run an access membership option designed to make accessible bookings more straightforward, especially if you regularly attend shows across their theatres.
- What it unlocks: the ability to book accessible seats and request access services online, plus companion ticket options once your account is registered with access needs.
- What to prepare: your Access Card number or equivalent supporting evidence, following their guidance, so your access requirements can be verified and attached to your profile.
LW Theatres Access Scheme
LW Theatres operates its own access scheme aimed at making accessible booking simpler for shows within its venue group.
- What it unlocks: online access booking that can include wheelchair positions and other accessible options, helping you choose the correct ticket type with fewer booking barriers.
Delfont Mackintosh support model (useful expectations)
Delfont Mackintosh theatres are known for a structured access approach that’s helpful to understand even if you’re new to London theatre logistics.
- What it unlocks: a clear access contact route for booking guidance and practical support on arrival, which can reduce the stress of navigating entrances, lifts, and seating routes in older theatre buildings.
Best practice tip (this saves real frustration)
Register before tickets drop for high-demand shows. Accessible inventory is limited and can sell quickly, and registration delays are one of the most common reasons people miss the best wheelchair bays, transfer seats, or companion-adjacent options.
Once you’re registered, you can use MusicalsAndTickets.co.uk to compare shows and dates efficiently, then book through the appropriate access route with your requirements already organized and ready to apply.
Companion / Essential Companion Tickets (How to Ask Without Awkwardness)
Companion tickets can feel uncomfortable to request if you worry you’ll be judged or have to over-explain. The easiest way to frame it is practical and factual: an essential companion seat exists so you can attend safely and with equal access, not as a discount hack. When you state your needs clearly and provide the requested proof, most venues handle it routinely.
What a companion ticket is actually for
An essential companion ticket is intended for a person who must attend with you to help you access the performance safely and comfortably. That support might be physical assistance (mobility, transfers, navigation) or practical support (communication, sensory regulation, task help). The key point is that it removes a barrier that would otherwise stop you from attending on the same basis as other customers. It’s not a “2-for-1” deal, and presenting it that way can complicate your booking.
Evidence and common eligibility patterns
Venues often ask for a standard form of proof to confirm eligibility. This is usually straightforward, and it helps protect the scheme from misuse so it remains available for people who genuinely need it.
- Nimbus/Access Card is commonly accepted, often using indicators like +1 or +2 to show companion requirements.
- Venue-specific registration may be used instead of (or alongside) an Access Card, especially where theatre groups run their own access schemes.
Practical booking scripts (copy-paste)
Use a short, direct script that states what you need and invites the venue to recommend the best seat options. You’re not asking for “special treatment”; you’re asking for the correct configuration.
Phone/email template:
I need [wheelchair space / step-free route / aisle seat with minimal steps]. I also require [essential companion seat]. I can provide [Access Card +1 / other evidence]. What seats do you recommend for best sightlines and least transfers?
Optional add-on line (only if relevant): “If possible, please place the companion seat adjacent to the wheelchair position or as close as the layout allows.”
You can start by comparing show dates and availability on MusicalsAndTickets.co.uk, then use the venue’s access channel to get the companion setup applied correctly.
Common pitfalls (and how to avoid them)
- Companion seat separated from the wheelchair bay: ask explicitly whether the companion seat will be adjacent, and if not, what the nearest available option is.
- Companion seat priced incorrectly online: if the checkout looks wrong, stop and contact the access team before paying; fixing it afterward can be slower and sometimes impossible.
- Late proof requests delaying confirmation: have your evidence ready before you book, and send it promptly if requested so your reservation doesn’t sit in limbo.
Choosing Seats When Your Priority Is Access (Not Hype)
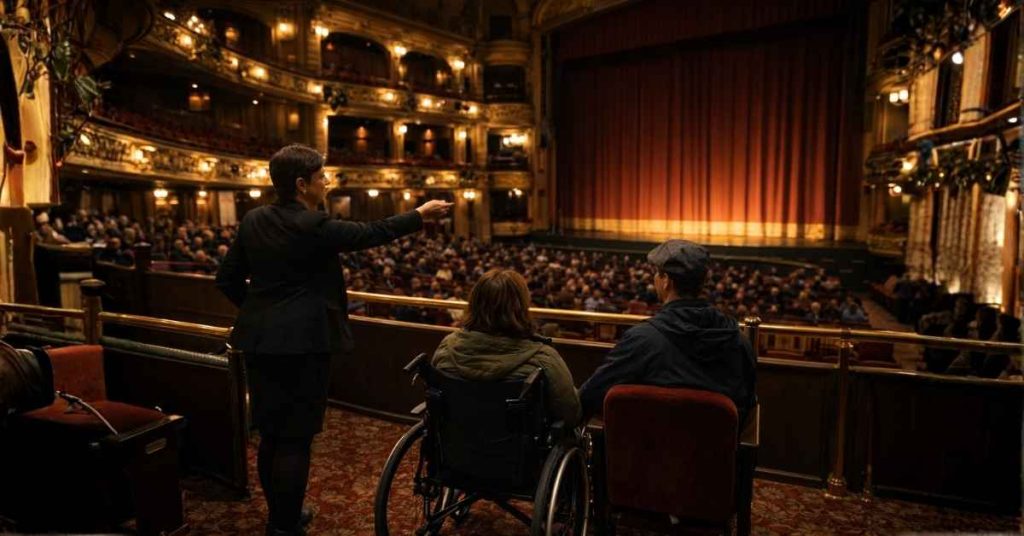
When you’re booking with access needs, the “best seat in the house” isn’t the most expensive one or the one social media talks about. The best seat is the one that matches your body, your support needs, and your route through the building—without forcing you to compensate with extra pain, extra fatigue, or constant adjusting. Use MusicalsAndTickets.co.uk to compare show dates and ticket options, then apply the checks below before you commit.
Wheelchair bays and sightlines
Wheelchair positions can vary wildly between theatres—even within the same pricing tier. Before you book, verify the practical details that determine whether you’ll actually enjoy the show.
- Viewing angle: are you facing the stage head-on, or watching from a steep side angle that forces neck rotation?
- Distance: is it close enough to read facial expressions and staging details comfortably, or so far that you’ll strain to track action?
- Potential obstructions: ask about rails, balcony overhangs, sound desks, and whether audience heads can cut into the sightline.
- Turning space: confirm you can maneuver into position without awkward pivots, especially if you use a longer chair or power chair.
- Companion position: clarify whether the companion seat is adjacent, directly behind, or off to the side—and whether that works for your support needs.
Ambulatory-accessible seating
Ambulatory-accessible seats are often the “quiet MVP” for people who can walk but need to reduce strain. The goal is not perfection; it’s minimizing the parts of a theatre visit that typically cause pain spikes or fatigue crashes.
- Minimal steps: ask for the lowest-step route from entrance to seat, not just the lowest row number.
- Proximity to an accessible WC: being closer can save your energy and reduce anxiety during interval.
- End-of-row/aisle preference: easier entry/exit, more space to adjust posture, less disruption if you need to move.
Sensory and fatigue-friendly seat strategy
If you’re managing sensory overload, fatigue, chronic pain, or anxiety around crowds, your seat strategy should prioritize flow and breathing room. You’re building a calmer experience by reducing friction points.
- Prefer calmer routes: ask for the simplest internal path with fewer narrow corridors and fewer pinch points.
- Easy exit: aim for an aisle or near-aisle position so you can leave without squeezing past a full row.
- Less squeeze: avoid tight rows or steeply raked sections where standing up and letting people pass becomes a repeated stressor.
- Aisle bias (when possible): it gives you micro-control—space to stretch, adjust, or regulate without feeling trapped.
“Restricted view” warnings (access edition)
Restricted view seats aren’t automatically bad, but they can be a bad match for access needs. A rail or overhang that’s “fine” for someone who can lean, twist, or sit forward can become a constant problem if you need stability or have limited mobility.
- Rails and safety bars: if your eye-line is lower or fixed, a rail can block key parts of the stage.
- Overhangs: can cut off upper-stage action, screens, or flying effects—especially frustrating if you can’t reposition easily.
- Side-angle restrictions: may force sustained neck rotation, which is manageable for some, punishing for others.
Practical rule: if you’re considering a restricted view ticket, treat it as “verify first” rather than “take the gamble.” A two-minute check with the venue can save you a two-hour fight with your own body.
Picking a Performance That Matches Your Needs
Accessible planning isn’t only about the seat. The performance type and time of day can make the same show feel either smooth and enjoyable or unnecessarily hard work. The smart move is to choose a date that includes the support format you need, then build a schedule that protects your energy and reduces “transport chaos” risks.
Captioned / signed / audio-described / relaxed
Many London theatres schedule specific performances with added access support. These aren’t “special shows” in a separate category—they’re standard performances with an additional layer that makes them usable for more people.
-
Captioned performances display dialogue and key sound cues as text (for example, lyrics, announcements, and important off-stage sounds).
Who it helps: Deaf and hard-of-hearing visitors, people processing speech more easily through text, and anyone who benefits from reduced reliance on audio clarity. -
Signed (BSL) performances include a British Sign Language interpreter positioned to be visible throughout the show.
Who it helps: BSL users and visitors who prefer sign language to spoken English, especially in fast-paced dialogue or lyric-heavy musicals. -
Audio-described performances add spoken description of visual action, scene changes, costumes, and physical storytelling via a headset.
Who it helps: Blind and partially sighted visitors, and anyone who benefits from structured narration of visual moments. -
Relaxed performances are designed to reduce pressure and intensity. This can include softer lighting, adjusted sound levels, and a more flexible environment where moving or making noise is handled with understanding.
Who it helps: neurodivergent visitors, people with sensory sensitivity, anxiety, Tourette’s, learning disabilities, and families or companions supporting someone who needs a less rigid setting.
How to find the right dates: start with the show’s official page and the theatre’s access listings (often an access calendar), then confirm details with the venue. The exact setup can vary by performance—especially for where the interpreter stands, how captions are delivered, and how audio-description equipment is collected.
You can use MusicalsAndTickets.co.uk to compare show options and dates quickly, then narrow down to the specific supported performance that fits your needs.
Timing strategy
The time you choose can be just as important as the seat. A matinee might look “easier” on paper, but an evening show can sometimes be calmer depending on your routine and how you handle crowds.
- Matinee trade-offs: often better for energy if you fatigue later in the day, and you’ll travel home earlier. However, daytime transport can still be busy, and you may feel rushed if you’re coming from a hotel check-in, a long journey, or a slower morning routine.
- Evening trade-offs: can offer more time to pace your day, rest, and eat calmly beforehand. The downside is peak commuter crowding on some routes, darker travel conditions, and a higher impact if something goes wrong (like a lift outage or delays) because your margin for recovery is smaller.
- Lift reliability risk: if your plan depends on lifts for step-free travel, avoid schedules with zero flexibility. A single lift outage can force a reroute that adds walking, transfers, and stress.
Practical rule: avoid tight turnarounds. Build an arrival buffer that reflects real life—slower pacing, lift access, queues, and the time it takes to locate the correct accessible entrance. If you arrive early, you win twice: less stress now, and a smoother seat/assistance setup before the house lights go down.
Planning the Journey Across London Without Burning Your Energy Budget
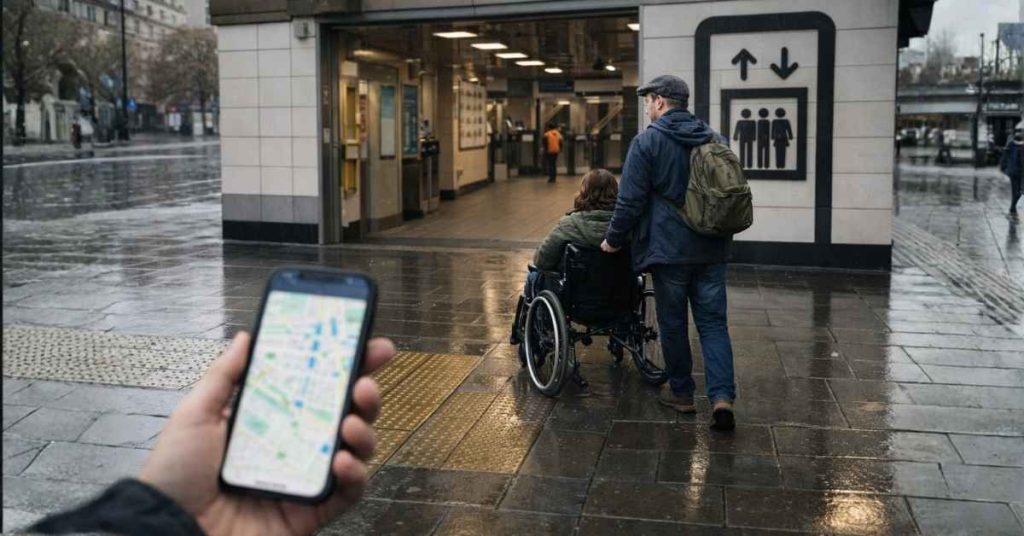
In London, the distance on a map rarely matches the effort in your body. Stairs, long corridors, uneven pavements, station layouts, crowds, and lift availability can turn a “quick hop” into a draining mission. The goal is to plan for minimum friction: fewer changes, shorter walking stretches, and a route that still works if something fails.
Start by confirming the theatre area and showtime (you can compare venues and dates on MusicalsAndTickets.co.uk), then build a transport plan that protects your energy like it’s a paid ticket—because it is.
Use TfL journey planning filters
TfL planning tools aren’t just for finding the fastest route; they’re for finding the most manageable one. Use filters that prioritise comfort and predictability over speed.
- Fewer changes: each transfer adds risk—wrong platform, long corridors, crowded escalators, tight timing.
- Less walking: some “simple” routes hide long inside-station walks and multiple street-level crossings.
- Avoid stairs/escalators: choose step-free options where possible, and treat “a few steps” as a real cost if you’re pacing pain or fatigue.
- Route stability: pick routes with fewer “single points of failure” (e.g., one lift that, if out, breaks the whole plan).
Step-free reality check
“Step-free” isn’t a binary yes/no in London—it’s often conditional. Do a station-by-station check using the Step-free Tube guide so you understand what “accessible” means for your specific journey.
- Station feasibility: confirm both ends of the trip, not just the departure station.
- Step/gap indicators: some stations have a step up/down or a wide gap between train and platform—important for wheelchairs, mobility aids, and confidence.
- Ramp/mini-ramp guidance: certain stations rely on staff ramps; that can be smooth if planned, stressful if you arrive rushed.
- Inside-station distance: step-free routes can be longer; “accessible” can still mean “a long walk.”
What to do when lifts fail (because they sometimes will)
Lift outages happen. The difference between a bad day and a manageable day is whether you planned for it in advance.
- Build a backup route before you leave: save a second option that uses different stations or a different line so one lift outage doesn’t trap you.
- Plan a “pivot point”: identify the station where you’ll decide whether to continue or switch routes based on how you’re feeling and what’s working.
- Keep your theatre contact details handy: if delays spike, you can adjust arrival expectations early instead of panicking at the door.
- Use TfL’s accessibility support approach: their guidance indicates help is available to find an accessible alternative if a step-free route breaks due to lift outages—so don’t suffer in silence or force an unsafe route.
Fast rule: if your plan depends on a single lift at a single station, it’s not a plan—it’s a gamble. Add redundancy.
Taxi/rideshare vs public transport (honest comparison)
You’re not “failing London” by taking a cab. You’re managing resources. The best choice is the one that gets you to your seat calm and functional.
-
When public transport is great:
- Direct step-free lines with predictable stations
- Trips where you can avoid peak crowding
- Journeys with minimal walking inside stations
- When your energy is stable and timing is flexible
-
When a cab is smarter:
- Late-night travel when you want a door-to-door finish
- Pain flares, fatigue spikes, or mobility variability on the day
- Tight timing where one delay cascades into stress
- Heavy rain plus uneven pavements (London loves both)
- When lift outages make the step-free route uncertain
Practical planning move: treat taxi/rideshare as your Plan B even if you prefer public transport. Just knowing you have a backup reduces anxiety—and that alone can save energy.
Arrival Plan: Getting From Street to Seat Calmly
The difference between a smooth accessible theatre visit and a stressful one is often decided in the first ten minutes. Your goal on arrival is simple: find the correct entrance, get oriented without rushing, and remove uncertainty before the lights go down. Plan your approach like a checklist, not a sprint.
Step-free entrance specifics
Many London theatres have a specific accessible entrance that isn’t the main door you’d naturally walk into. Sometimes it’s around the side, sometimes it’s a separate doorbell entry, and sometimes it’s a staff-assisted route.
- Confirm which door to use: don’t rely on “step-free available” as a complete answer.
- Confirm which side of the building: “left of the main entrance” and “stage door side” are not the same thing when you’re navigating crowds.
- Confirm who to ask for: access host, duty manager, front-of-house supervisor—having a role title helps when staff rotate.
- Ask about the internal route: lifts, corridors, gradients, and whether you’ll be escorted.
Practical move: screenshot or note the entrance instructions on your phone so you’re not searching through emails outside in the rain, surrounded by a pre-show crowd.
Security and bag policy (access-first framing)
Security checks and bag rules can create unnecessary stress if you arrive with a bulky bag or everything buried at the bottom. Pack for speed and comfort.
- Pack light: smaller bags move faster through queues and fit better under seats.
- Keep essentials accessible: meds, inhalers, glucose supplies, ear protection, water, and anything you may need quickly.
- If you’re unsure about medical supplies: ask the venue in advance about what’s permitted and whether any documentation is helpful.
- Mobility aids and equipment: confirm where they can be stored if you’re transferring, and whether staff can assist without delay.
When you’re comparing shows and planning timing, use MusicalsAndTickets.co.uk to pick a performance that gives you a realistic arrival window—then protect that buffer so you don’t hit security in panic mode.
Toilets and interval strategy
Don’t wait until you need the toilet to figure out where it is. Older theatre buildings can have surprising layouts, and the accessible WC may not be where you expect.
- Identify the accessible WC location before curtain: ask staff to point it out or confirm the nearest option to your seat.
- Plan your interval timing: if queues are hard physically or sensory-wise, tell staff early and ask for timing guidance (for example, whether leaving a minute before the interval rush helps).
- Choose the least stressful option: some people prefer a quick pre-show visit, others prefer to move immediately at interval; there’s no “correct” choice—only what protects your comfort.
Assistance dogs
If you attend with an assistance dog, the goal is a settled, safe spot that doesn’t block aisles or create repeated interruptions.
- Confirm where the dog can settle: under-seat space, side space, or a designated area depending on your seating location.
- Ask how staff handle aisle clearance: you want a plan for entry/exit that avoids crowd squeeze and keeps the dog calm.
- Confirm access routes: use the same step-free or low-stress entrance strategy so you’re not forced through tight, noisy corridors.
Bottom line: arrive with a plan, not a guess. When you know the right door, the right route, and the right facilities, your body can relax—and that’s when the show actually feels like a night out, not an obstacle course.
Inside the Venue: Requesting Support Without Hassle
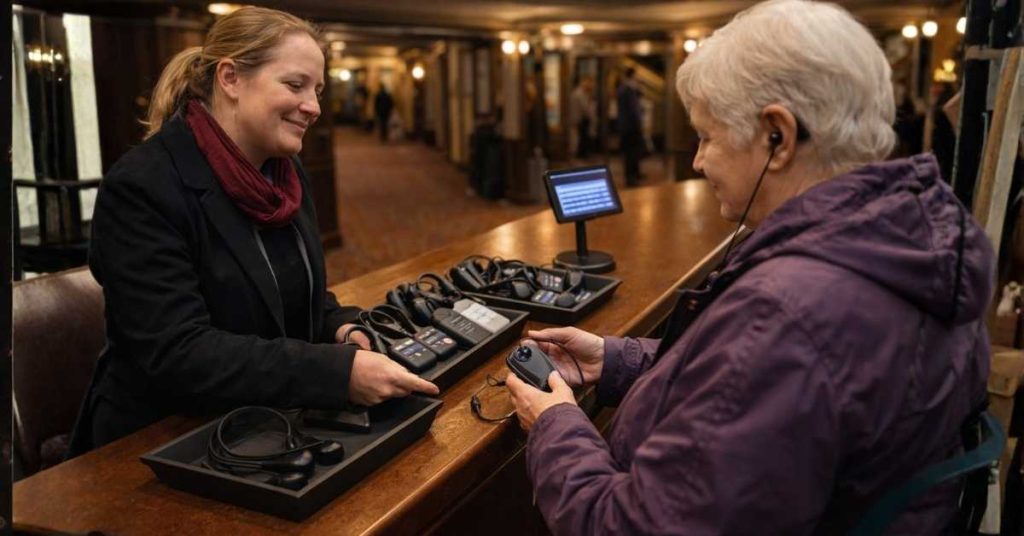
Once you’re through the door, the goal is to get your support setup handled early, quietly, and with minimal back-and-forth. The biggest win is removing uncertainty before the auditorium fills: know where to collect equipment, how it works, and when you need to return it. If you’ve booked via the venue access route, your request is often already logged—your job is simply to activate it on arrival.
Hearing support
Many theatres offer assisted listening systems, but the process is usually “request + collect + return,” not automatic delivery to your seat.
- How to request: when you arrive, ask front-of-house for the assisted listening device (use the exact phrase you were given during booking, or say you need a receiver with a neck loop if you use hearing aids with a T-setting).
- Where to pick up: typically from the access desk, box office window, cloakroom-style counter, or a designated front-of-house point. Confirm the location immediately so you’re not hunting later.
- Quick setup check: ask staff to help you confirm volume and connection while you’re still in the foyer. Fixing it in your seat, in the dark, is a bad time.
- Where to return it: clarify the return point and whether it must be returned the same night or can be dropped at a specific desk on exit.
Audio description
Audio description typically involves a headset (and sometimes a receiver unit) that delivers narration of visual action. The best experience comes from collecting equipment early and confirming how the venue runs the process for that specific performance.
- Headset pickup: ask where audio description headsets are issued and whether you need to leave a deposit or provide ID (policies vary).
- Pre-show briefings: some venues offer a short introduction or orientation. If that matters to you, arrive early enough to catch it—don’t assume it happens at the last minute.
- Seat choice for best sync: you generally want a stable sightline and minimal acoustic interference. If you’re choosing between options, ask which seats tend to provide the cleanest signal and least distraction for audio-described performances.
- Test before curtain: confirm the headset is working while house lights are still up; if there’s a channel issue, it’s much easier to fix then.
Captioning
Captioning can be delivered via a fixed caption unit in the venue or through a device-based system. Either way, your seat position matters because you’re balancing two viewing targets: the stage and the captions.
- Positioning rule: aim for a seat where you can see both the stage and the caption display without constant head-turning. A small angle can be fine; a persistent twist is not.
- Avoid extreme sides: side seats can force you to choose between watching the action and reading captions comfortably.
- Ask the venue what “works best”: if captions are on a fixed unit, staff can usually recommend the most comfortable zones for visibility.
- Confirm the plan before you sit down: if captions are device-based, ask where to collect the device, how brightness/positioning works, and when to return it.
Practical takeaway: collect and test support equipment early, while staff are available and before the auditorium is dark and crowded. That single habit prevents most “I can’t hear / it’s not working / I can’t see the captions” stress spirals.
If Something Goes Wrong (Your Calm Contingency Playbook)
Even with good planning, things can go sideways: a lift goes out, a seat isn’t what you expected, or a device you rely on isn’t ready. The key is not “staying positive.” The key is having a simple system that keeps you calm and gets you to a workable solution fast. Use this playbook like a checklist so you don’t waste energy arguing with uncertainty.
The “3 checks”
When something feels wrong, run these three checks in order. It keeps the problem small and prevents you from getting bounced between people with no result.
-
1) Check policy
Confirm what you actually booked: ticket type (wheelchair bay, transfer seat, ambulant accessible), any access notes on your reservation, and whether a companion seat is included. Most “conflicts” are really mismatches between what the system issued and what you intended. -
2) Check staff point
Go to the right person early: front-of-house supervisor, access host, or box office (depending on the venue). Don’t spend ten minutes explaining your needs to someone who can’t change seating or authorise adjustments. -
3) Check alternative
Ask for the most realistic fix, not the perfect fix. Common alternatives include:- Move to a different seat that meets your access needs better
- Use a different entrance or internal route
- Rebook to a later performance that has the correct access setup
Fast phrasing that works: “I’m not asking for a better seat; I’m asking for a seat that matches the access requirements on my booking.”
Common failure modes (and what they usually mean)
-
Access seat not correctly assigned
This often happens when an accessible label was applied loosely (or not at all). Solution path: box office or access host verifies inventory and swaps you into the correct configuration. -
Lift outage blocks the route
If the planned step-free route is broken, ask immediately for the alternative entrance or internal route. If there is no safe option, the realistic solution may be rebooking—pushing through stairs you can’t manage is not a “brave moment,” it’s a preventable problem. -
Caption device unavailable
This could be limited stock, a battery issue, or a device not allocated to your booking. Ask staff whether another unit exists, whether there’s a different caption delivery method for that performance, or whether they can relocate you to a better caption sightline if the unit is fixed. -
Companion ticket not issued properly
Sometimes the companion seat is missing, mispriced, or assigned far away. Solution path: box office/access team checks eligibility notes and corrects the booking so the companion is placed appropriately.
What to document (so issues get fixed faster)
You don’t need a drama log. You need a clean record that helps staff resolve the situation quickly and, if needed, helps you follow up after the show.
- Who you spoke to: name (if offered) or role title (front-of-house supervisor, access host, box office)
- Time: approximate time you raised the issue and when it was addressed
- What was promised: seat move, device provision, alternative entrance, refund/rebook path, or follow-up contact
Practical takeaway: the calm approach is systematic. Run the 3 checks, get to the decision-maker, and accept the best workable alternative before you burn your energy on the wrong battle.
Your Rights, Explained Briefly and Usefully (No Legal Lecture)
In the UK, theatres and ticket providers are expected to make reasonable adjustments so disabled people and people with access needs can use their service without being put at a substantial disadvantage. In plain terms: you shouldn’t have to “make do” with an unsafe route or an unusable seat if a workable adjustment is available.
The practical translation: ask early, be specific, and expect a workable solution.
- Ask early: the earlier you flag your needs, the more options exist (better seat inventory, correct entrance plan, reserved devices, staff support).
- Be specific: “step-free entrance via lift,” “wheelchair space (non-transfer),” “aisle seat with minimal steps,” “captioning required,” or “essential companion seat.” Vague requests get vague outcomes.
- Expect a workable solution: reasonable adjustments usually look like an alternative entrance, a different seat type, assistance from staff, access equipment, or a rebook/refund path when access can’t be provided safely.
Also keep expectations realistic: “reasonable” typically means practical and proportionate for the venue. Older buildings may have constraints, but that doesn’t mean you’re stuck—often it means you need the venue to help you choose the right seating zone or performance date.
Best habit: keep a simple record (what you requested, who confirmed it, and when). If something goes wrong on the day, calmly ask for the front-of-house supervisor or access host and restate the access requirement as a functional need, not a preference.
When you’re choosing shows and dates, start by comparing options on MusicalsAndTickets.co.uk, then lock in access details through the venue’s access route so your booking reflects the adjustments you actually need.
Quick Tools: Copy-Paste Templates + Checklists
When you’re booking accessible theatre tickets, speed and clarity beat long explanations. These quick tools help you communicate your needs in one line, confirm the right booking details, and avoid the “I assumed it would be fine” trap. Use them while comparing show options on MusicalsAndTickets.co.uk, then apply them when you contact the venue or complete your booking.
One-line access needs summary (examples)
Copy, paste, and edit one of these so you can state your needs without overthinking it:
- “Wheelchair user (non-transfer), step-free entrance required, companion seat next to bay.”
- “Limited stairs + fatigue; need minimal steps, aisle seat, near accessible WC.”
- “Hearing loss; need hearing enhancement device; prefer central sightline.”
Tip: Keep it functional. You’re describing what makes the visit workable, not giving your life story.
Booking checklist
Before you press “pay,” verify the essentials. If any one of these is unclear, stop and confirm—fixing it afterward is usually harder.
- Seat type confirmed: wheelchair bay vs transfer seat vs ambulant accessible/aisle/low-step seat.
- Companion ticket confirmed (if needed): included, priced correctly, and positioned appropriately.
- Accessible entrance instructions received: which door, which side of the building, and who to ask for.
- Device/support reserved: captioning and/or audio description and/or hearing kit confirmed for your performance.
- Refund/exchange policy noted: know what happens if access can’t be delivered as expected.
Day-of checklist
This is the “keep it calm” list. Two minutes of prep can prevent a full-body stress spiral.
- TfL route + backup saved: one primary route and one fallback route that uses different stations/lines.
- Arrival buffer set: build in real time for lifts, queues, and slower pacing.
- Theatre contact stored: box office/access number saved in your phone, not buried in email.
- Accessibility confirmation ready: email and/or screenshots saved offline so you can show staff quickly.
Final practical move: If you’re travelling with a companion, share the plan (entrance, pickup point, and timing) before you leave. Coordination is the cheapest accessibility upgrade you can buy.
FAQ
Should I call the theatre even if I can book online?
Yes, if your booking involves anything that can’t be “guessed” from a standard seat map: wheelchair spaces, step-free routes, transfer support, companion placement, or specialist devices. Online systems are improving, but theatres still vary by layout and internal routes. A quick call can confirm the right seat type and the correct entrance, which is where most problems start.
What’s the difference between a wheelchair bay and a transfer seat?
A wheelchair bay (wheelchair position) means you stay in your wheelchair for the performance. A transfer seat means you move from your wheelchair into a theatre seat and your wheelchair is stored during the show. The best choice depends on your comfort with transfers, your chair type, and how far storage is from your seat.
Can I get a companion/PA ticket, and what proof is usually accepted?
Often yes, if you need an essential companion to attend safely and access the performance. Proof varies by venue, but common patterns include an Access Card with a +1/+2 indicator or venue-specific access registration. The simplest approach is to ask the theatre’s access team what they accept and provide it early so your booking isn’t delayed.
Which is easier: matinee or evening?
It depends on your energy curve and how you handle crowds. Matinees can be easier if fatigue builds later in the day and you prefer an earlier return. Evenings can be easier if you need more daytime rest and prefer not to rush. The biggest factor is your buffer: choose the time that lets you arrive early without pressure.
Are all “step-free” stations fully level boarding?
No. “Step-free” usually means step-free routes within the station, but level boarding onto the train can still involve a step or a gap depending on the line and station. If you rely on fully level boarding, check station-specific details and consider alternatives where the platform-train gap is smaller or ramp support is available.
What if the lift is out of service on my route?
Have a backup route saved before you leave. If a lift outage breaks your step-free plan, reroute to a different station or line rather than trying to force stairs. If you’re running late because of accessibility disruptions, contact the theatre as early as possible so staff can guide you to the correct entrance or advise on options.
How do captioned performances work in practice?
Captioned performances provide text for dialogue and key sound cues. Captions may appear on a fixed caption unit in the venue or via a device-based system. The practical tip is seat positioning: you want to see both stage action and captions without constant head-turning. Confirm the caption format with the venue when you book.
Can I bring medication, snacks, or medical equipment?
Usually yes, especially for essential medical needs, but policies vary. Pack in a way that makes security checks quick: keep medications and medical items easy to access. If you’re bringing equipment or have strict dietary/medical requirements, contact the venue in advance to avoid problems at the door.
Where should I sit if I need quick exit access?
Prioritise an aisle or near-aisle seat with a simple route to the exit. This reduces the need to squeeze past a full row and helps if you need to leave promptly or manage pain, fatigue, or sensory overload. Ask the access team for seats with the least internal navigation and minimal steps.
How early should I arrive if I need staff assistance?
Earlier than the average crowd. A good target is arriving with enough time to find the correct accessible entrance, collect any devices, confirm the route to your seat, and locate the accessible WC before the auditorium fills. If you have a lift-dependent route or need equipment pickup, build a larger buffer than you think you need.
What’s a relaxed performance, and is it only for children?
A relaxed performance is designed to reduce pressure and intensity—often with softer lighting, adjusted sound, and a more flexible environment. It’s not only for children. It can be helpful for neurodivergent adults, people with anxiety, sensory sensitivity, learning disabilities, Tourette’s, or anyone who benefits from a less rigid setting.
Are accessible tickets safe to buy from resellers?
Be careful. Accessible and companion tickets often require eligibility and may be issued under specific terms. If tickets are misused or purchased outside the correct channel, policies can allow cancellation. The safest approach is to book accessible seating through the theatre’s access route or official schemes so the ticket matches your needs and remains valid.
What do I do if my seat doesn’t match what I booked?
Act early—ideally before you enter the auditorium. Check your ticket details and any access notes, then go straight to the box office, access host, or front-of-house supervisor. Ask for a seat configuration that matches your access requirements. If the correct setup can’t be delivered safely, discuss rebooking or exchange options.
How do I plan if I’m travelling solo?
Plan for simplicity and redundancy. Choose a route with fewer changes, save a backup route, arrive earlier, and store the theatre’s contact details in your phone. If you need assistance inside the venue (entrance guidance, device pickup, seat access), tell the access team you’re attending solo so they can advise the smoothest arrival process.
Extra practical tip: Compare show dates and venues on MusicalsAndTickets.co.uk, then confirm access details with the theatre so your plan is built on real routes and real seat types—not assumptions.